
Knot Your Average Bracelet: A Friendship Bracelet Tutorial for Beginners
A tutorial on how to create a candy stripe friendship bracelet.
Friendship bracelets are a summer staple. Decorating your wrists and ankles in a plethora of vibrant colors and unique patterns can be one of the most exciting parts of the summer season. Below is a short tutorial on how to make the simplest pattern: the candy stripe.
Preparation
- Start by picking out four colors of embroidery floss. You can use a singular color for all four strings, but it tends to get confusing as the strings can easily become mixed up. To avoid this, use four separate colors. This tutorial will use four strings, but a thicker bracelet can be made by adding strings to the pattern. Using less than four strings is doable but tends to cause the bracelet to curl as you create it, making it difficult to work with.
- Take one of the colors and measure out the string so it reaches from the tip of your middle finger to the end of your shoulder. Cut that string, and then cut the three other strings to the same length as the first.
- Once you have four strings of approximately the same length, tie them in a knot, leaving about an inch of string on one end. This will ensure you have enough string on the side of the bracelet to keep it tied on your ankle or wrist.
- Tape the bracelet down to a flat object like a table, notebook or clipboard. Arrange the strings in the order you want the colors to be. Once you have completed these steps, your bracelet should look like this.

Bracelet-Making
- To begin the candy stripe pattern, create a four-like shape by crossing string one over string two.
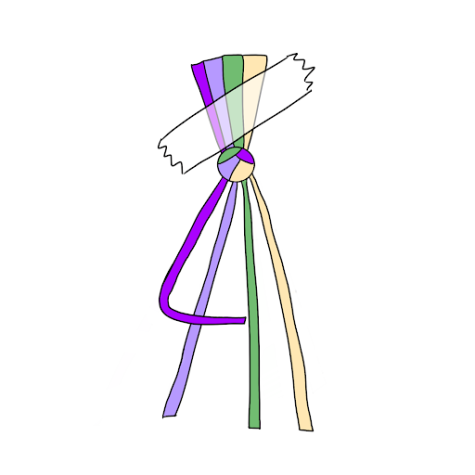
- Take the end of string one and pull it under string two, placing the end of string one in the gap between string one and two.
 Pull the end of string one over the rest of string one, pulling upwards until a small knot forms at the top of string two.
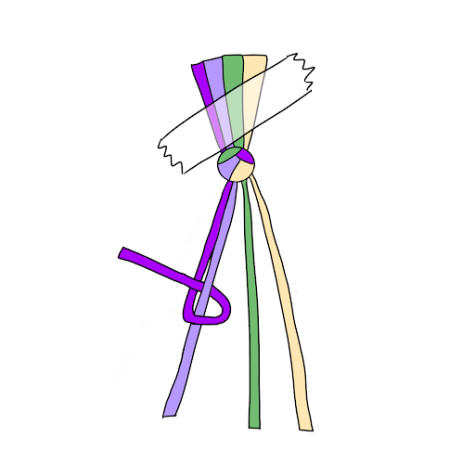
- Repeat steps one through three again with strings one and two so there are two knots at the top of string two. Once you’ve completed two knots, move string one past string two so it is in between strings two and three.

- Repeat these steps, replacing string two as your base with strings three and then four, eventually laying string one to the right of string four.

- Continue the pattern by repeating steps one through five: knotting the string farthest to the left over the strings to its right.
TIP: As you go, the bracelet may start to twist. To counteract this, use a second piece of tape and move it down every so often to prevent twisting. The bracelet twisting isn’t a big deal, but it can just make the process more difficult.
TIP: As you go through the pattern, make sure you’re watching how long it is, occasionally wrapping it around your wrist to see much more you need to complete.
Ultimately the bracelet will end up looking something like this: 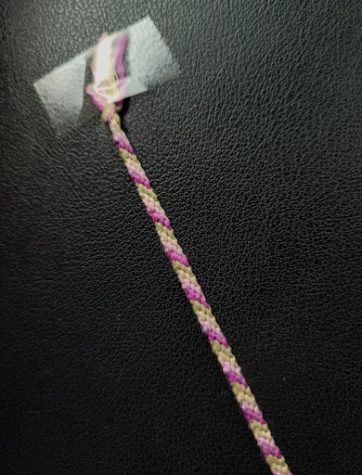
After completing your first bracelet, feel free to try the same candy stripe pattern again with more strings. You can also move on to a more complicated pattern. These can be found on pinterest.com, braceletbook.com and many other online resources.